
'/%3e%3cpath%20d='M4.94162%205.99547L4.02701%205.08086L3.63428%205.47359L4.94162%206.78093L7.63768%204.08487L7.24495%203.69214L4.94162%205.99547Z'%20fill='white'/%3e%3cdefs%3e%3clinearGradient%20id='paint0_linear_2302_10195'%20x1='0.5'%20y1='10'%20x2='10.4939'%20y2='10'%20gradientUnits='userSpaceOnUse'%3e%3cstop%20stop-color='%234E10FF'/%3e%3cstop%20offset='1'%20stop-color='%23AB17DF'/%3e%3c/linearGradient%3e%3c/defs%3e%3c/svg%3e)
The acquisition of villagers is a fundamental pillar for progression in Minecraft, as it enables the creation of trading halls and iron farms. An automatic villager farm optimizes this process by eliminating the need to manually feed units and manage their offspring.

This article details the technical procedure to build an efficient model compatible with the most recent versions, including update 1.21.

To ensure proper farm functionality, it is imperative to build it at a minimum distance of 100 blocks from any pre-existing village, bed, or workstation. This prevents interference with villager linking mechanics within the farm structure.
Main materials
- Beds (minimum 3): essential to activate breeding.
- Composters (2): assign the farmer profession.
- Building blocks: glass or solid blocks.
- Trapdoors: required for the drop system.
- Water: one bucket for farming and additional buckets for transport.
- Crops: approximately 3 stacks of carrots or potatoes.
- Villagers (2): the genetic base of the farm.
Step-by-step building procedure
1. Terrain preparation and farming area
The core of the farm consists of a 9 × 9 block cultivation area.
- Place one water block in the center.
- Till the soil within a 4-block radius in all directions.
- Enclose the perimeter with two-block-high walls (glass is recommended).
- Place a composter on top of the water block, leaving an air space above it.
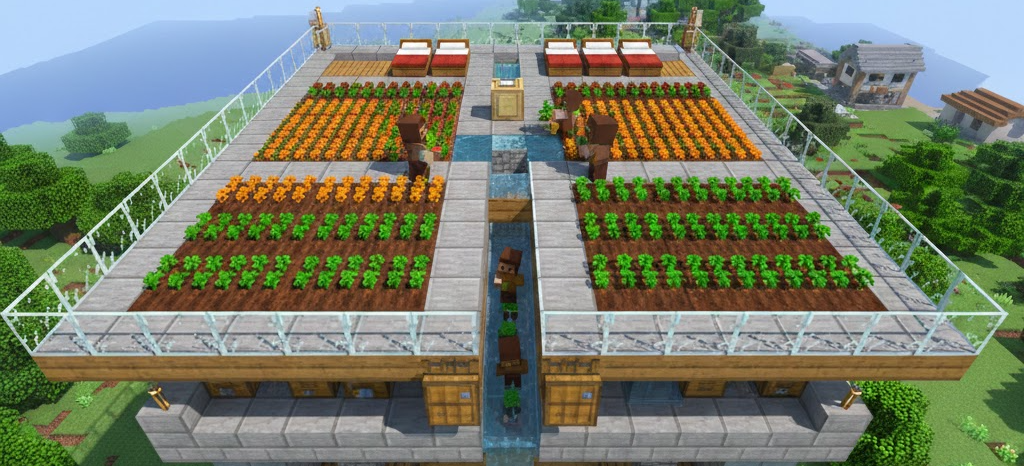
2. Breeding system configuration
- Expand the structure to place at least three beds.
- Create a 2 × 1 or 3 × 1 block-deep pit between the crops and the beds.
- Install open trapdoors over the pit.
The artificial intelligence detects open trapdoors as solid blocks. Baby villagers will attempt to walk toward the beds and fall into the pit.

3. Villager introduction and automation
Introduce the two villagers into the farming area. After assigning them the farmer profession using composters, they will begin harvesting and replanting automatically.
When one villager has a sufficient food inventory, they will share it to initiate breeding. The baby villager will search for an available bed, fall into the pit, and can then be collected.
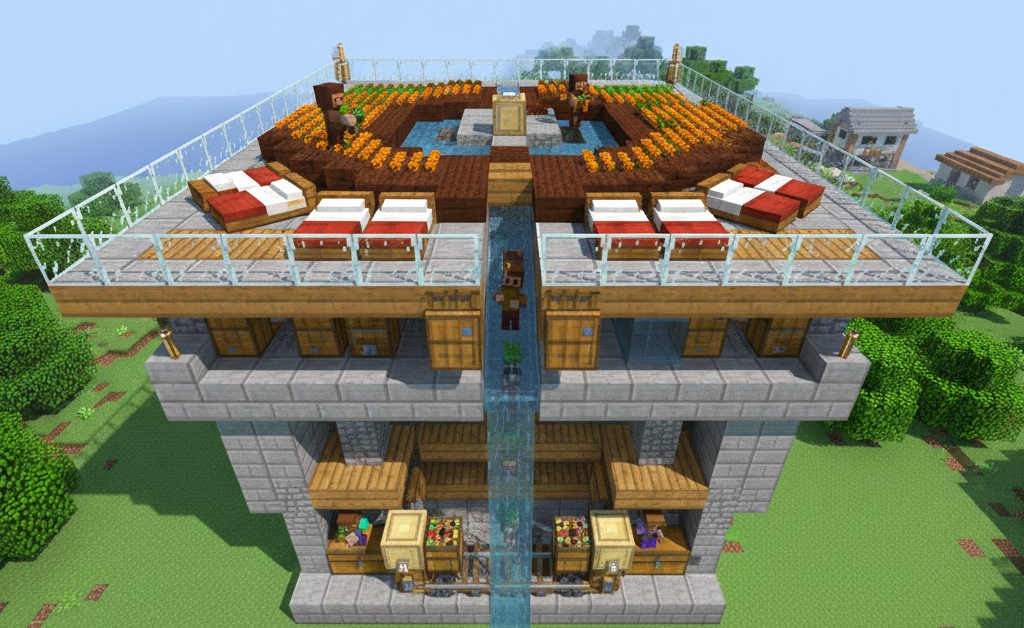
4. Collection system (Optional)
At the base of the pit, a water stream system can be installed to push baby villagers toward a collection point or into a Nether portal for remote storage.

Efficiency analysis and technical considerations
Production speed directly depends on how quickly farmers fill their inventory. Using carrots is preferable to wheat, as carrots require no additional processing and do not generate seeds that could clog the inventory.

Implementing an automatic villager farm requires precision in bed placement and structural isolation. Once established, it provides a continuous supply of essential units for resource optimization and advanced in-game trading.
7
0
NEWSLETTER
Subscribe!
And find out the latest news
Other news you might be interested in
Etiquetas


